| Thank you for Signing Up |


Elementor is one of the most popular WordPress plugins. But to my surprise, I couldn’t find one single article talking about optimizing images for SEO when using it. In a previous article, I covered why Image SEO is so important and the impact it can have on a website’s SEO performance.
As the CEO of an SEO company, I’ve noticed that even experienced SEO professionals often don’t know the ins and outs of Elementor’s image features when they first join our company. If SEO experts can find it challenging, it’s no wonder website agencies and WordPress users struggle with this too or worse: They don’t even realize how they are hurting their SEO if not used appropriately. That’s why I’m writing this guide — to help everyone to get it right.
Before we dive into common mistakes, let’s start with how to properly format images for SEO in Elementor:
Method 1: Proper Image Formatting for SEO with Elementor
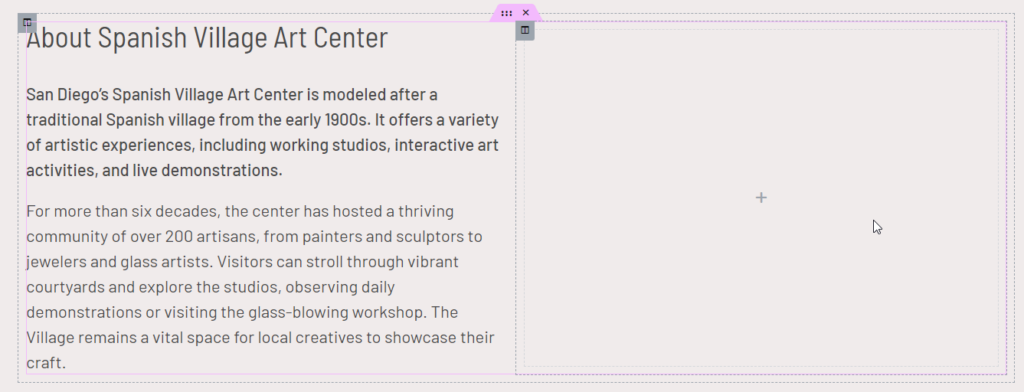
Here’s an example layout in Elementor, where we have text on the left and a space reserved for an image on the right:
The first thing you want to do is measure the space where your image will go. I use a tool called Screen Ruler (https://sourceforge.net/projects/screenruler/), but any other screen ruler tool will do. In this case, the column is about 620 x 440 pixels. To give myself some breathing room, I add 20 pixels to each side, making the final image size 640 x 460 pixels.
I then save the image as a compressed JPG with a 50% compression rate (Photoshop’s setting of 5). This brings the file size down to around 45KB, or even 20KB if you’re using WebP format:
I named the image “Spanish-Village-Art-Center.jpg“.
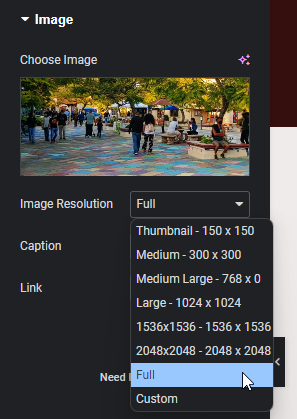
The name is descriptive and optimized for SEO since it matches the content on the page. Also, I made sure to set the image resolution to “Full” in Elementor’s settings:
Why This Works:
- The image is displayed at the correct size (640 x 460 pixels), so it doesn’t get stretched or shrunk.
- The image size is only 45 KB, because you had full control when saving it the size you wanted it to be.
- With the image resolution is set to “Full” in Elementor, the original file name remains unchanged, i.e. in this case it will stay exactly as “Spanish-Village-Art-Center.jpg“.
Method 2: Alternative Image Formatting for SEO in Elementor
In this method, I’ll use a higher-resolution image, sized at 1600 x 1150 pixels with a file size of 250 KB. I’ll still name the image “Spanish-Village-Art-Center.jpg” and, just like the previous method, set the resolution to “Full”:
The filename will remain SEO-friendly, exactly as it is: “Spanish-Village-Art-Center.jpg.” However, the image size is now 250 KB, which is much too large for this purpose and not SEO-compliant. Google tends to penalize oversized images and huge file sizes.
So, we can’t do it that way. But I wanted to show you what would happen.
Here is the solution that works well with this method:
Luckily, Elementor provides the option to choose different image sizes, such as “Thumbnail – 150 x 150”, “Medium – 300 x 300”, “Medium Large – 768 x 0”, and “Large – 1024 x 1024.” While choosing smaller sizes like “Thumbnail” or “Medium” can reduce the file size, they will also significantly reduce the image resolution, leaving your 620-pixel wide column with a blurry, low-quality image.
So, you don’t want to use “Thumbnail – 150 x 150,” or “Medium – 300 x 300”.
A better option would be to select “Medium Large – 768 x 0,” which is wider than 620 pixels and ensures better image quality.
Here’s what happens with this approach:
Elementor automatically resizes the image to 768 x 552 pixels, reducing the file size to 75 KB — which is way better than 250 KB you have to admit. While this is still acceptable, it’s nearly double the size of the 45 KB image in Method 1 above. This is because Elementor compresses the JPG on its own, leaving you with less control over the final file size.
Additionally, the filename is now “Spanish-Village-Art-Center-768×552.jpg“. While the added suffix in the filename “-768×552.jpg” won’t hurt your SEO rankings, you’ve lost control over the original name, and Elementor has renamed it automatically.
Although this method works, it’s not ideal.
Now, let’s take a look at some of the most common mistakes people make when using Elementor for SEO image optimization.
Method 3: Why You Should Avoid Using Custom Image Sizing in Elementor
For this method, we’ll once again use the image from Method 2: 1600 x 1150 pixels with a file size of 250 KB and the filename “Spanish-Village-Art-Center.jpg.”
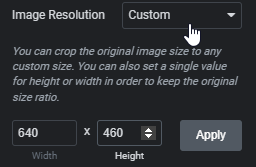
You might be thinking, “Wait a minute! Elementor has a feature that allows me to set a custom size for the image. Isn’t that perfect?” It sounds like a great solution, allowing you to specify the exact size you want:
However, there’s a significant drawback. When you check the file name, you’d expect it to be something like “Spanish-Village-Art-Center-640×460.jpg.” Unfortunately, that’s not the case. Instead, Elementor renames it to something like this:
“Spanish-Village-Balboa-Park-qu9dp2gupygf10n4j74pqfdwkzz5r72wur37q0du60.jpg“
This random string goes against Google’s Image File Naming Guidelines, which emphasize the importance of descriptive, keyword-rich filenames. Using this method can harm your SEO efforts. For this reason, I strongly advise against using Elementor’s “Custom” image size feature.
We’ve even reported this issue to Elementor, explaining that it contradicts Google’s guidelines. While Elementor’s team acknowledged the problem, they suggested avoiding the “Custom” feature.
My recommendation remains: Stick with Method 1 or Method 2 and avoid the “Custom” feature at all costs.
| Thank you for Signing Up |


 by
by 


